


Sync Products to WooCommerce From API Easily (Beginner to Advanced)
Introduction
Running an online store can be a hassle if you’re stuck manually updating product information. From pricing changes to stock availability, product data needs to stay fresh at all times. That’s where syncing products to WooCommerce from an API comes in. Whether you’re a beginner or a seasoned developer, this guide will walk you through the process step by step — from understanding the basics to implementing advanced automation.
👉 If you’re new to WooCommerce, you may also want to check our guide on importing WooCommerce products from CSV to see the difference between CSV uploads and API sync.
What Does It Mean to Sync Products to WooCommerce From API?
An API (Application Programming Interface) acts like a messenger that allows two platforms to communicate. When you sync products to WooCommerce from API, you’re automating the transfer of product data from another system (like a supplier, ERP, or another eCommerce platform) directly into your WooCommerce store.
For a deeper look, visit the official WooCommerce REST API documentation.

Benefits of Syncing Products via API
Here’s why syncing products through an API is a game-changer:
-
🔄 Real-time updates: Stock and pricing changes reflect instantly.
-
⏳ Time-saving: Reduce manual product entry tasks.
-
📈 Scalability: Sync thousands of products without slowing down.
-
✅ Accuracy: Minimize human error when updating products.
-
🛒 Multi-channel growth: Connect your WooCommerce store with suppliers, marketplaces, and CRMs seamlessly.
👉 Related: See how Elementor Loop Grid with ACF helps create dynamic product layouts after syncing.
Prerequisites Before You Start
Before diving into syncing, make sure you have:
-
A WooCommerce store up and running (download it here).
-
API access keys from the source system (supplier, marketplace, ERP).
-
Basic understanding of WooCommerce REST API (helpful, not mandatory).
-
A reliable sync plugin or a developer for custom integration.
Methods to Sync Products to WooCommerce From API
1. Using Plugins (Beginner-Friendly)
Plugins like WP All Import, WooCommerce API Manager, or custom API sync tools make this process simple.
Steps:
-
Install plugin
-
Enter API endpoint & credentials
-
Map fields (product title, SKU, price, stock, etc.)
-
Schedule sync

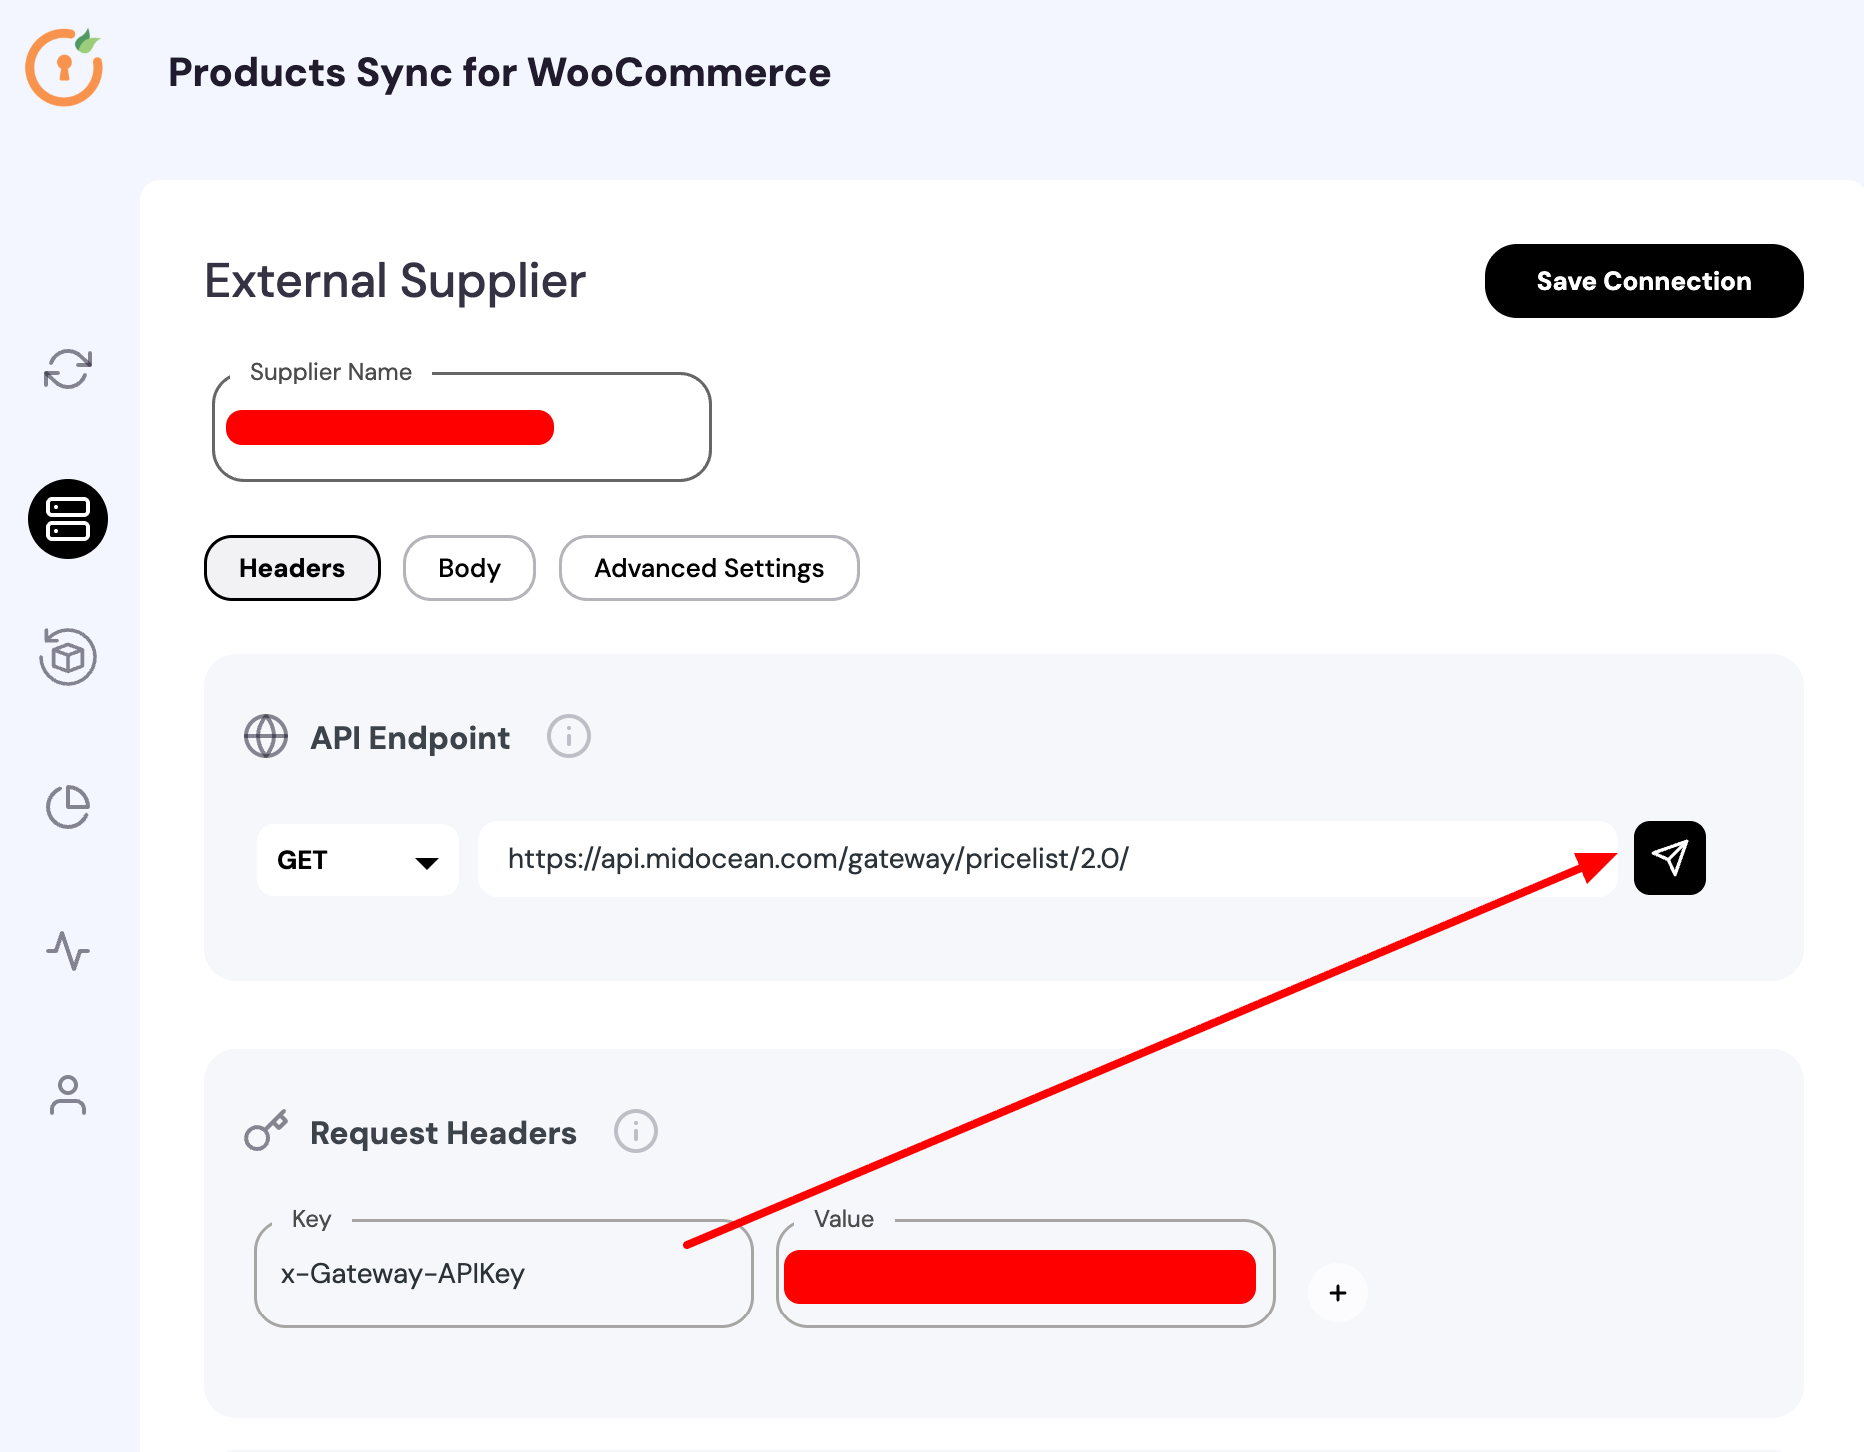
2. Using WooCommerce REST API (Intermediate)
For developers, WooCommerce REST API offers more flexibility.
-
Generate WooCommerce API keys (from WooCommerce → Settings → Advanced → REST API).
-
Use tools like Postman to test connections.
-
Build API calls to GET product data and POST it into WooCommerce.

Step-by-Step Guide to Sync Products to WooCommerce From API
-
Get API Credentials → Supplier or third-party will provide API key, secret, and endpoint.
-
Test API Connection → Use Postman or curl to verify responses.
-
Connect WooCommerce API → Add credentials in plugin or code.
-
Map Product Fields → Link supplier fields (title, price, stock) with WooCommerce fields.
-
Run First Sync → Import a few products to test.
-
Automate Sync → Schedule updates daily/hourly.
Common Challenges & How to Fix Them
-
❌ Authentication Errors → Double-check API keys.
-
❌ Slow Sync → Use batch imports or background processing.
-
❌ Duplicate Products → Match SKUs to prevent duplication.
-
❌ Missing Variations → Ensure variation attributes are mapped properly.
👉 Troubleshooting tip: Read our guide to WooCommerce theme issues to avoid conflicts that sometimes block syncs.
Best Practices for API Product Sync
-
Test on a staging site before syncing live.
-
Use logging tools to track errors.
-
Monitor API rate limits (some suppliers restrict calls).
-
Always keep a backup before major syncs.
Popular APIs You Can Sync With WooCommerce
-
Amazon API → Sell Amazon products in WooCommerce.
-
Shopify API → Migrate or connect your Shopify store.
-
ERP/CRM APIs → Sync inventory and order data.
-
Custom Supplier APIs → Dropshipping suppliers often provide product APIs.
Conclusion
Syncing products to WooCommerce from an API is no longer reserved for big brands. With the right tools, beginners can set up simple syncs in minutes, while advanced users can build custom solutions for complete automation.
👉 Want to optimize how products look after syncing? Check our tutorial on Elementor WooCommerce product design.
Take the next step — connect your supplier’s API today and watch your WooCommerce store manage itself!
Midocean API Data Fetch for WooCommerce with No Code: Step-by-Step Guide